The Laundry Sorter
For All Your Laundry Needs
Ning Ting Ni (nn255) & Chelsea Frisch (caf238)
Demonstration Video
Introduction
The Laundry Sorter is a one-of-a-kind product that helps people sort their laundry. Rather than getting lazy and throwing everything into one basket, The Laundry Sorter will ensure that one’s laundry is sorted appropriately. The user can select whether lights, darks, colors, reds, and/or whites go in different baskets. When using The Laundry Sorter, the user will drop their clothing into a box that is just above three baskets. A camera will then detect the color of the clothing. Based on the user’s selection, a turntable mechanism will be used to move the piece of clothing into the correct basket. You can put as many clothes as you want through The Laundry Sorter. At any point, you can chance the selections for each basket using the multi-select screen in each basket option on the touchscreen.
Project Objective:
- Able to sort laundry pieces based on five parameters into three laundry baskets.
- Take pictures of clothing and accurately detect the color of the clothing
- Giving users options between Red, Whites, Lights, Darks, and Colors for each laundry basket.
Design
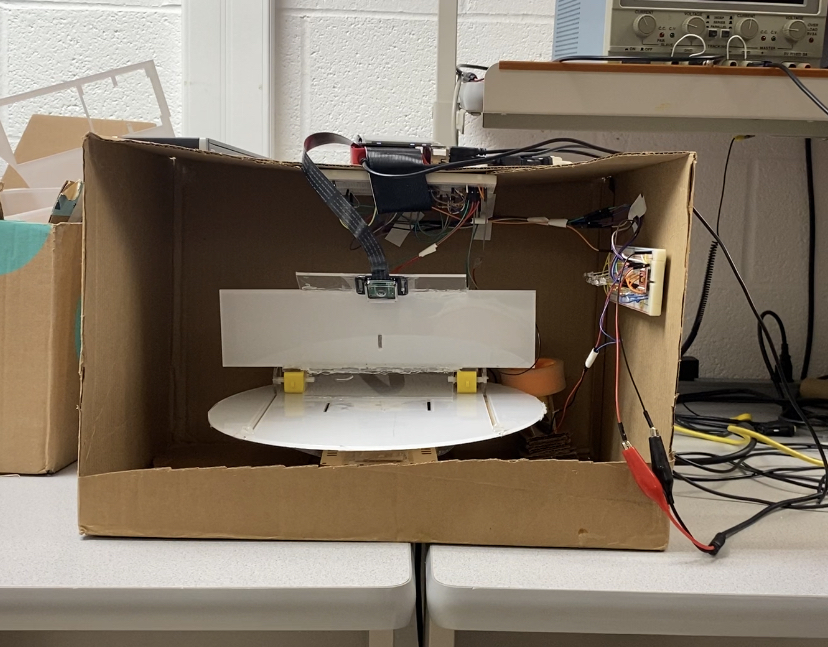
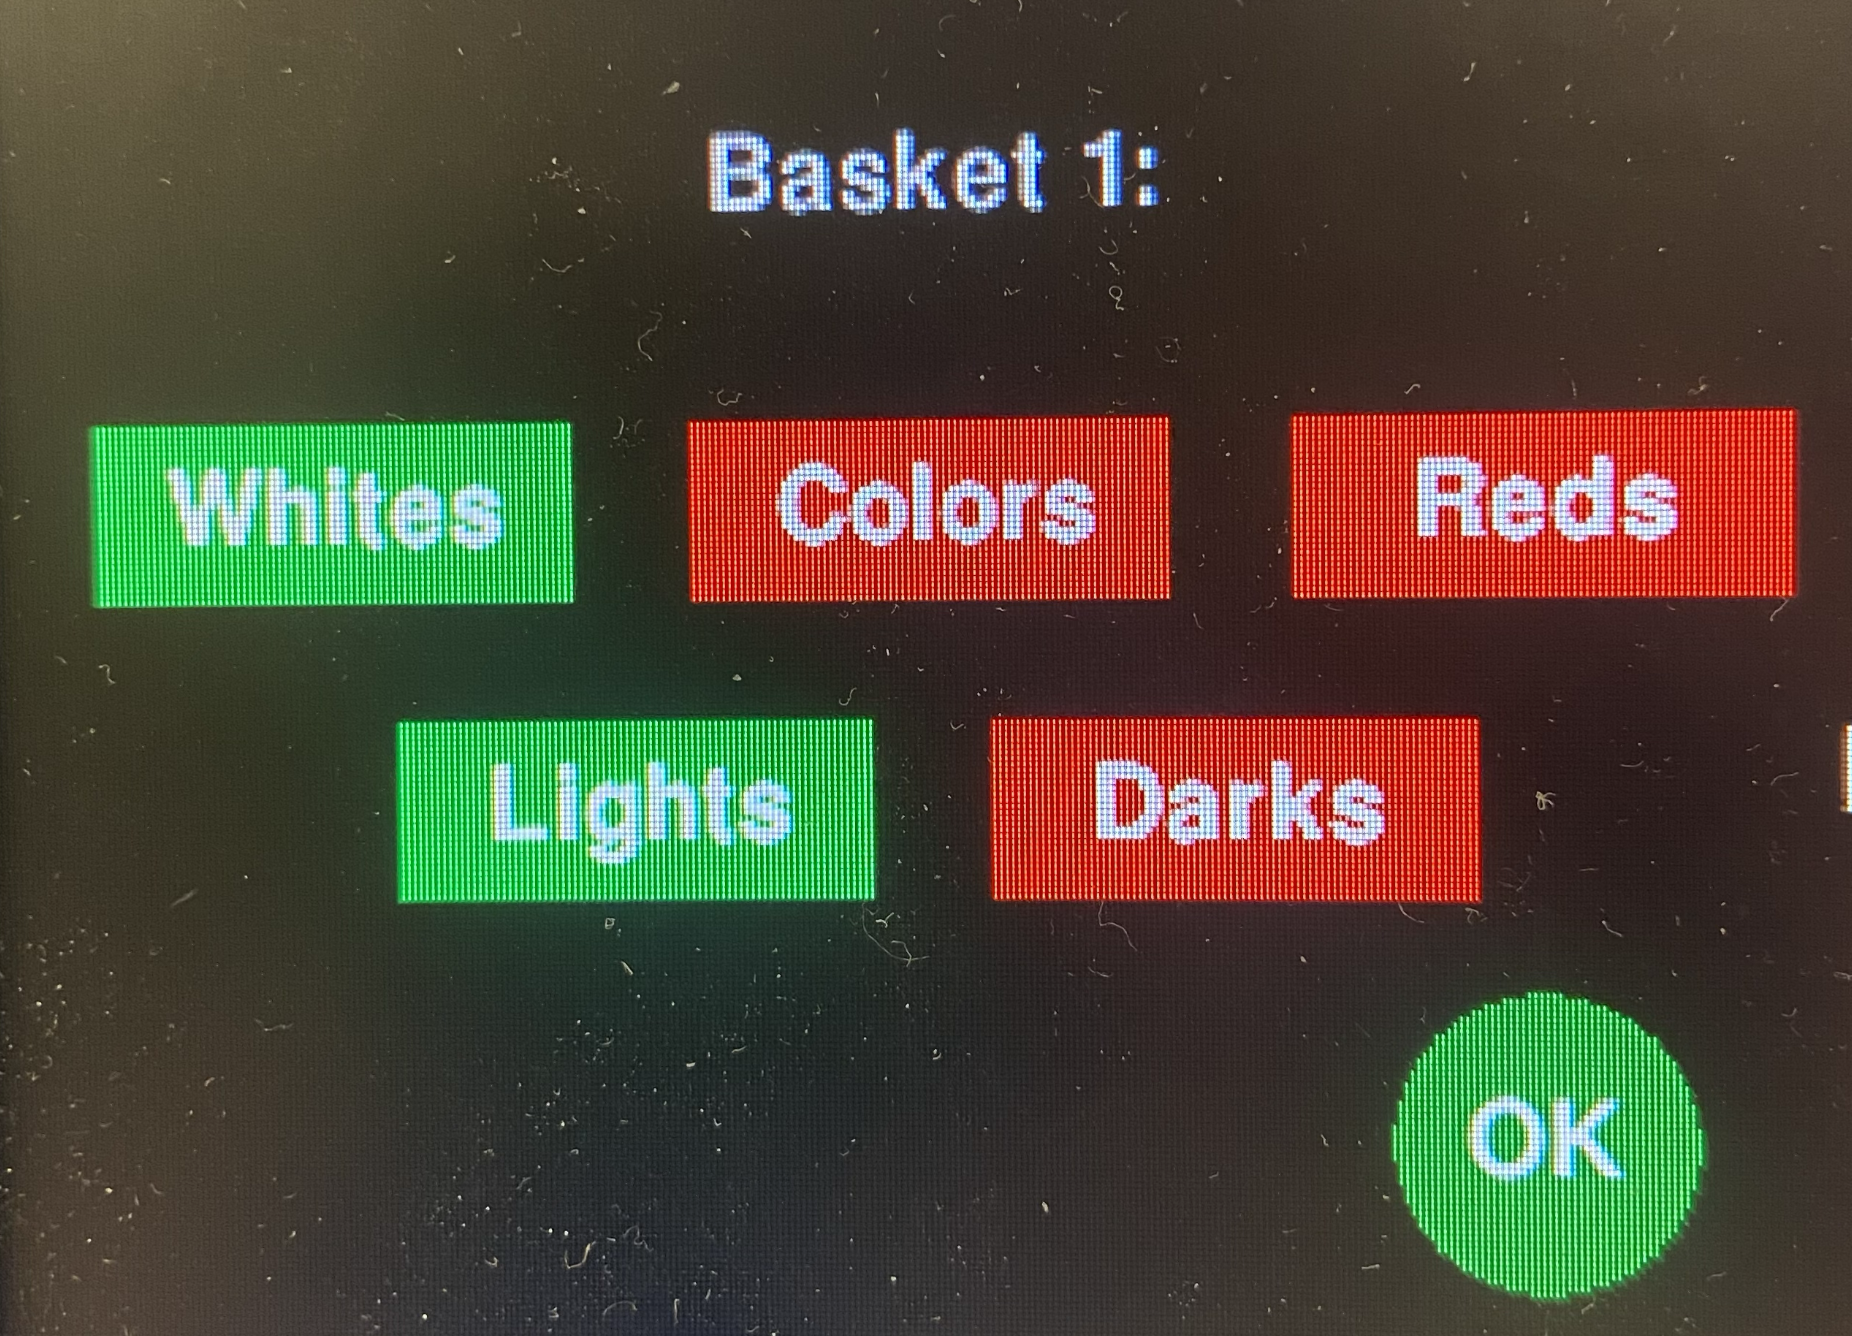
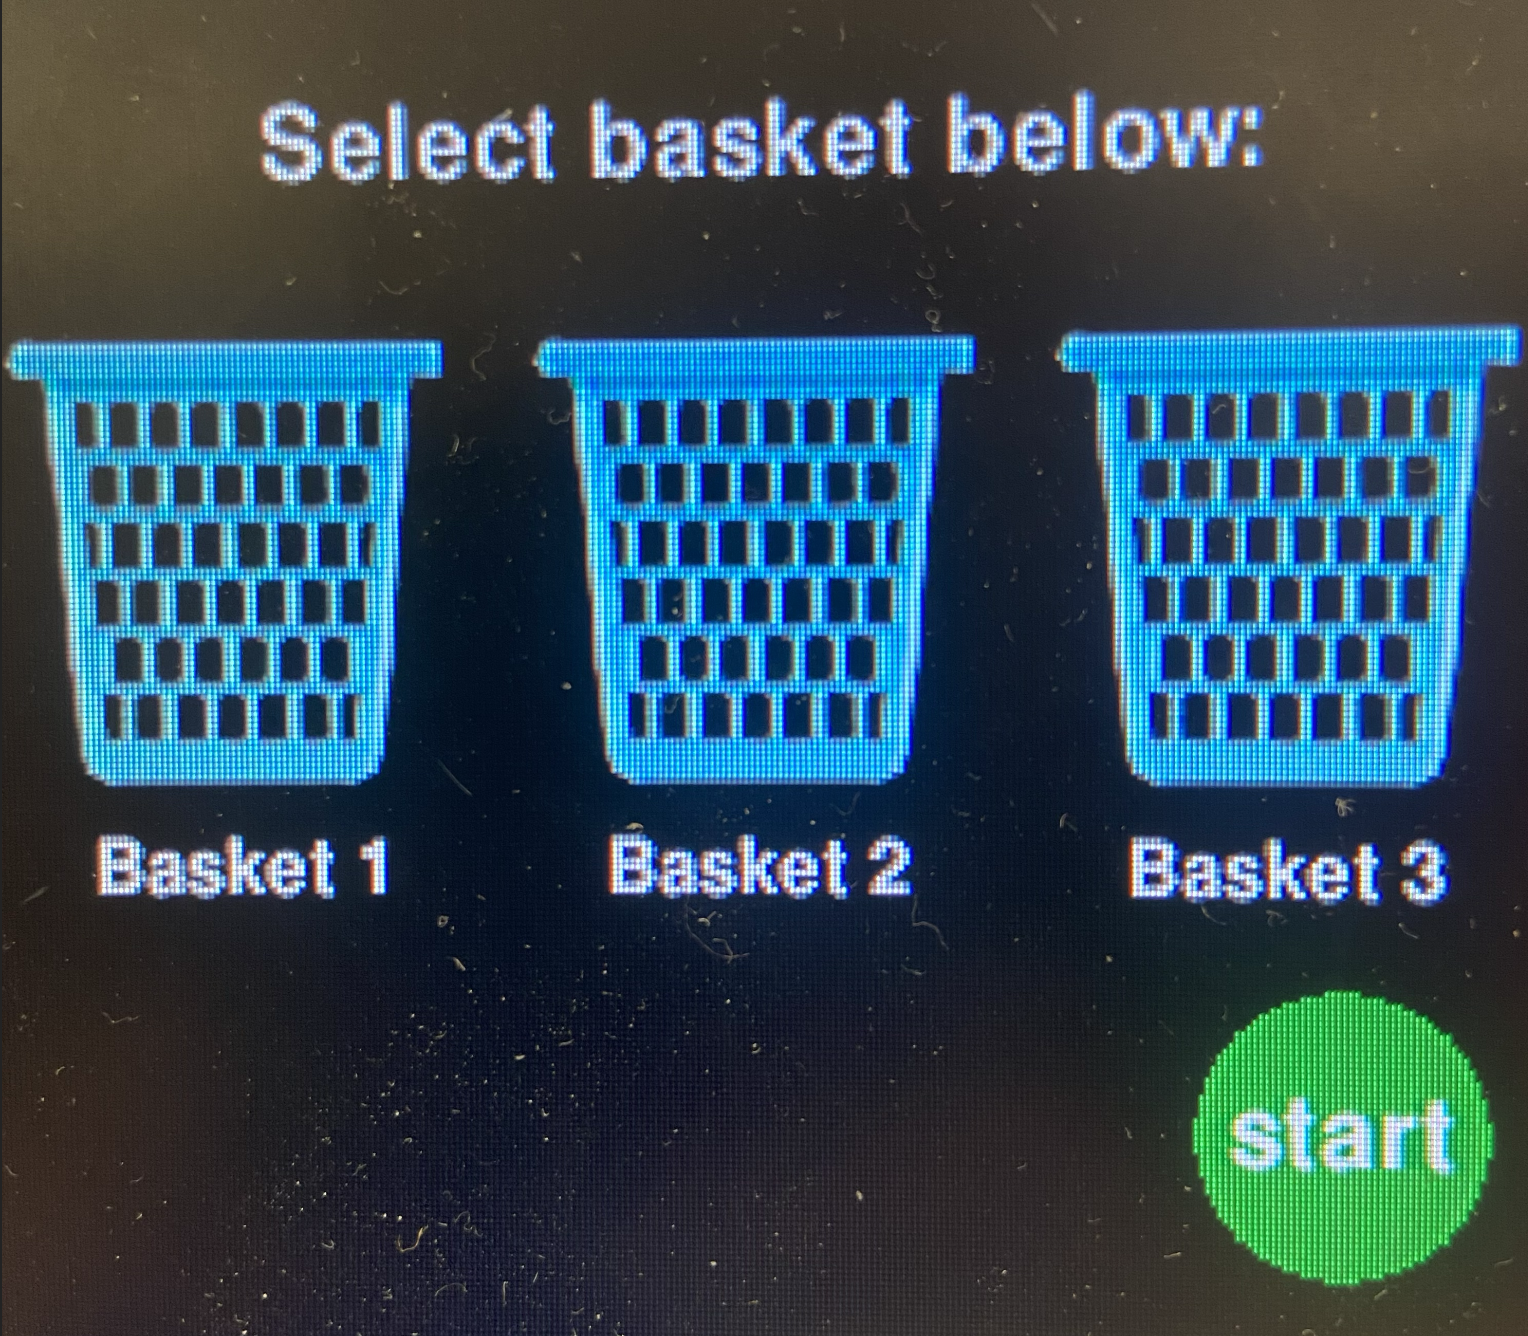
The Laundry sorter consist of a Raspberry Pi, piTFT, turntable, a push plate, and LED component. The first step in our design process was to get the touchscreen working. We first had a code named touchscreen.py that focused on the touchscreen specifically with nothing mechanical being considered. We first made a the “Level 1” screen. It has three selections: Basket 1, Basket 2, and Basket 3. There is also a start button placed in the corner and a statement that says “Select a basket:”. We left space to add pictures of laundry baskets later. We ended up adding this in towards the end of the project. We used the code from Labs 2 and 3 to code the touchscreen. Control_two_collide.py from Lab 2 reminded us how to get a picture on the screen, and run_test.py from Lab 3 reminded us how to put shapes around different buttons which was used on the “Level 2” screen. The “Level 2” screen allows the user to multi-select lights, darks, whites, colors, or reds for each basket. Once the user selects the colors they want in a specific basket, they can click the “OK” button to go back to the main screen. Overall, this portion of the lab went very smoothly.
Once OpenCV and color detection was working after a lot of debugging, we made a new code called touchscreen_motor.py. This implemented the motors into the touchscreen code. This was the start of the mechanical aspects of our project. We based our code for the motors on the Lab 3 code from run_test.py. We used the same DC motors that were used in Lab 3. We were worried that these motors would not be strong enough, but fortunately, they were strong enough in the end. This part of the project went very smoothly. The motors were still working, and we understood how to use the motor controller. We essentially had to add “if” statements into the code for when the motors should turn on, but we did not struggle with this.
The initial mechanical design was having a turntable powered by a DC motor in the center of it and another DC motor that would tip the table so the clothing could come off of it. After prototyping with cardboard and reconsidering the weight of clothing, we decided that this did make sense. Our mechanical design evolved into two components. The first is a turntable with an unplugged motor in the center that was used as an axel, and another DC motor with a wheel pressed against the outer edge of the turntable that created torque that turned the table from the outside. This worked better because there is more leverage from the outside of the circle, and therefore, less torque needs to be provided for sufficient rotation. The second part of the design is a shove mechanism that pushes the clothes into the correct basket when it turns. We struggled most with the turntable. We tried using the center for rotation for a while. Then, once we decided on using a wheel on the outside to maximize torque, we had to keep adjusting how the wheel was positioned. It had to be close enough to the table to have friction to turn it, but if it was too close, it would tip the table over.
Overall, we had less problems with our mechanical design than we expected. We create a CAD of the turntable, shove mechanism, and a box to support the table and create a casing for the motor beneath the table. This was then laser cut. For the most part, everything we laser cut fit very well. A few things were too loose so we filled these spots in with hot glue. We initially had the motor casing also being supports for the table, but we realized that the body of the motor is moving and the table is not, so this part cannot be attached to both the motor and the table. As a result, we used this as a support for the motor by stuffing cardboard around the motor to hold it in place, and we supported the turntable by using the wheel and body of the car from Lab 3.
We also implemented LEDs to put light on the clothing. We did not initially plan on doing this, but we decided to because OpenCV is very sensitive to light. The room was too dark, and everything was coming up as dark clothing. We fixed this by adding the LEDs. This took some time because we kept lowering the resistance to the LEDs until they were bright enough, but we wanted to be careful to not blow out the LEDs. The code for the LED was based on blink.py from Lab 3.
At this point all of the components were working. The biggest issues we ran into in the end were the color detection changing because of the varying light in the room based on the time of day, and our piTFT screen kept freezing. We tried debugging this for a long time. We figured out the line of code that was causing the issue, and we ran many tests to try in fix it. Unfortunately, we were not successful.
Testing
First, we started working on the code for the touchscreen in the python script touchscreen.py. We tested that by running it after building on it to make sure each component works. We didn’t have much trouble with the touchscreen script since it was ver similar to what we did in Lab 3. There were some troubles we ran into but we were able to debug it by going through the logic and using random print statements throughout the night.
At this point, we started working on OpenCV. We had a lot of trouble downloading OpenCV on the SD card. We tried all of the different options on Canvas and tried searching for other information about OpenCV. We went through a lot of the options in the first reference listed. We kept getting errors. We tried to work through each of the errors individually, but it did seem to help very much. Eventually, we decided to try our other SD card. Since we previously had three group members, we had a third SD card (the second one was the Preempt RT Kernel). OpenCV downloaded right away on this card, so we assume that our issues were probably from previous downloads on the old SD card.
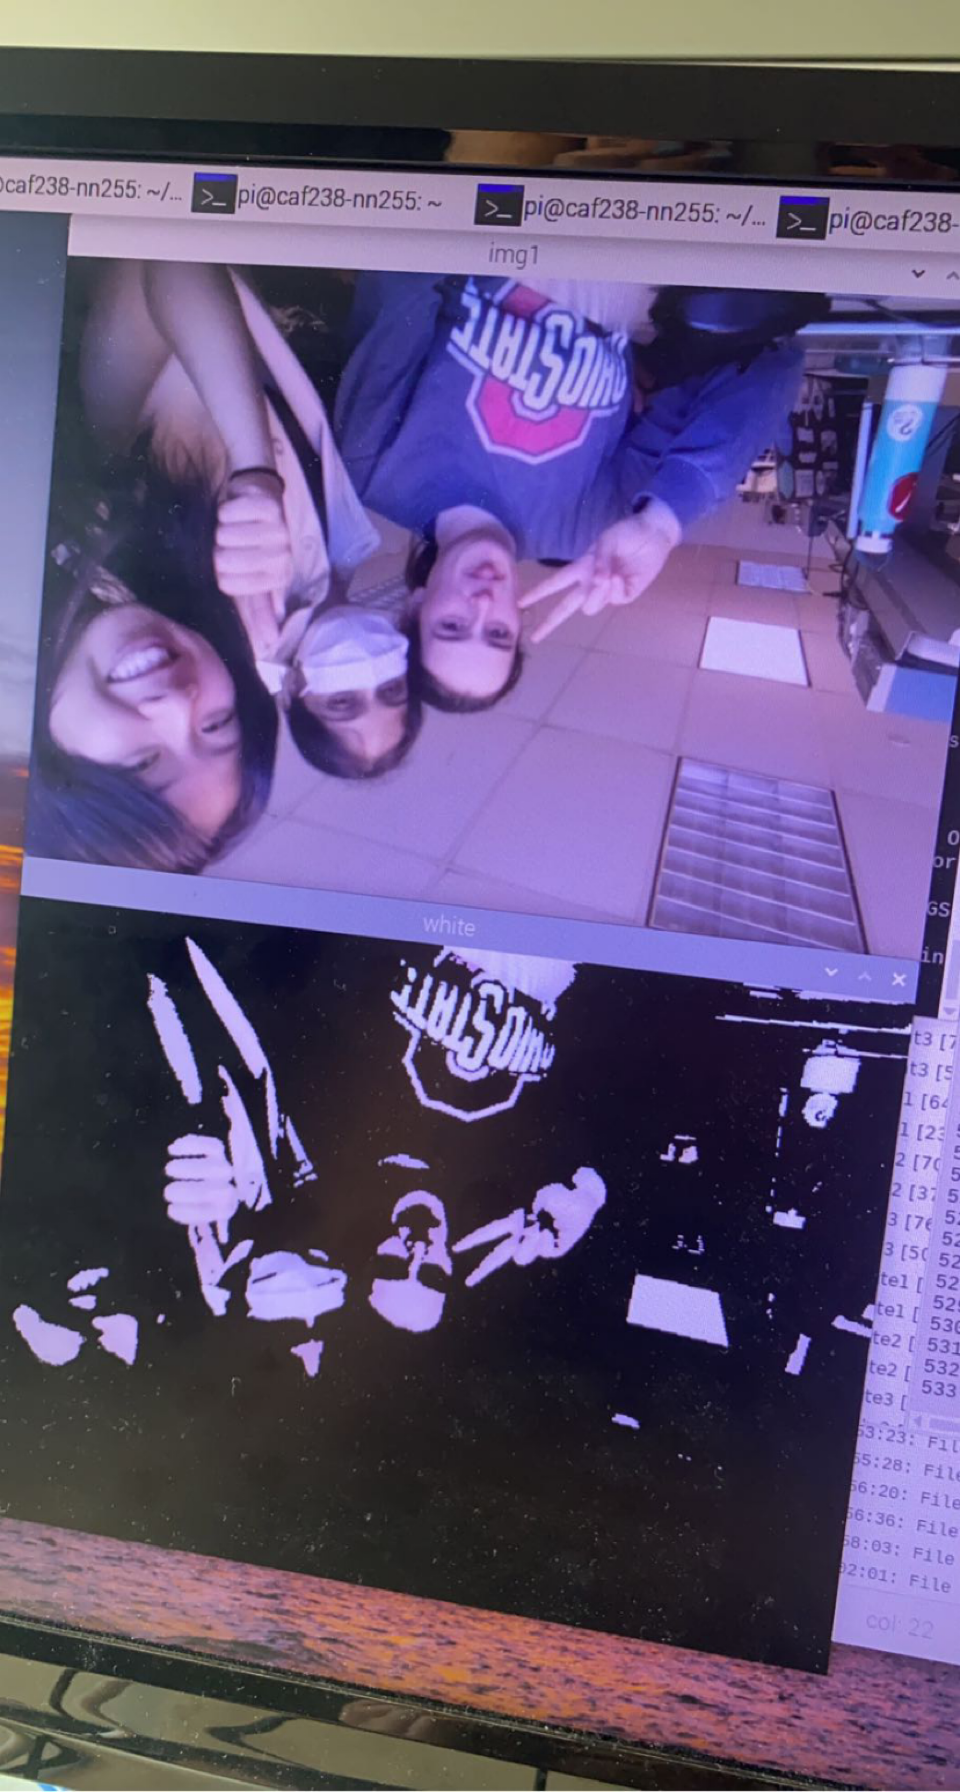
Later on, we started working on color.py, which is a script that allows us to utilize OpenCV. The code takes a picture and attempts to analyze it for specific colors. We specified certain color ranges for certain colors. We used references 2, 3, and 4 that are listed below to help with creating the code for the color detection. The script for check for colors within the range and create a mask. We had some trouble with getting the camera to analyze the correct colors. We tested this initially with the color red. We pointed the camera at random obviously red things around the lab. After some testing, it was obvious that openCV was not looking for red color. Eventually, we realized that we were using the wrong ranges for the colors. We alternated between some rbg ranges (color_rbg.py) and hsv ranges until we found a chart (reference 4) for hsv ranges that worked for openCV. We were eventually able to get masks of each color as seen in the figure below.
FNext, we moved on to testing the motors in a script called led.py. This was originally used to test LEDs but was later expanded to test all four outputs from the two motor controllers. It tested the leds, the rotational motor, and the two translational motors. We didn’t have much trouble testing the motors. There was an instance where the leds weren’t turning on. We realized that once we set the two output pins to HIGH and LOW, that solved the problem. Led.py was used consistently throughout the project to test the motors.
Eventually, we combined the touchscreen, and color detection code into a python script called touchscreen_motor.py. This was tested by running the programs and debugging. If we ran into issue, we would test it using led.py (motors), touchscreen.py (touchscreen), or color.py (opencv & camera). We realized that the camera was not taking a new picture every single time we pressed start. It would reanalyze the same photos but a little differently. As a result, it would give us similar results each time despite what we put under the camera. We tried a bunch of different ways to fix this in a script called picture.py. We tried to save the photo we had taken and then overwriting it with a new one taken. We realized that to get a new picture everytime, we had to create a new camera source in the while look. Previously, we had made one camera source to initalize. However, once we put the camera source inside the loop, the program would keep crashing and freezing after a few tries. Using picture.py, we were able to run it a few times before it eventually started freezing as well. In an attempt to fix this problem, we created a code called final.py, where we start with a code that works well and slowly move things into the code. However, after adding a few for and if statements, it started freezing as well. We attempted to shorten our code and make it more efficient by using def() to write functions. However, this did not solve our problem.
Result
Most things performed as planned. The five parameters were each coded and worked successfully most of the time. The touchscreen nearly always worked. We did not have any issues with the multi-select options. However, the OpenCV had flaws. They would work in one set of lighting at a certain point in the day, but they would not work later. This made it very difficult to have successful results. Ideally, we would have had a closed box with no light in it except for LEDs so the lighting would be consistent. However, the LEDs were not strong enough, so we had to have outside light go into the box which added variability. We knew OpenCV was sensitive, but we did not realize how sensitive it would be. We spent a lot of time changing the hsv ranges to match the new lighting. Lights and whites and darks and colors were specifically hard to distinguish with the lighting. The pictures of the clothing worked consistently. However, only two pictures could be taken before the program crashed. This problem started occurring when we reset the camera in the while loop, but when we put it outside the while loop, only one picture would be taken and analyzed. We were never able to resolve this issue. Our methods to resolve this are further discussed in the testing section.
Regarding our goals, we did learn how to use OpenCV. We now know how to detect color with a camera, rather than with just a color sensor. Another goal was to use the skills learned from Lab 2 and Lab 3 to make a user-friendly interface. We were successful in this. In fact, this was the part of the project that went the smoothest. We planned on having the device sort dark and light clothes at first, but we actually got white, darks, and reds working first. Even though this was different from our original goals, we were able to have multiple options as planned. Regardless, we eventually got all of the options working. We never expanded our design to include delicates or other types of fabrics. We were only going to do this if everything worked perfectly, but we had to debug other issues. Overall, our objectives and goals were met for this project.
Conclusions
Our project was able to perform well but not as well as we expected. We thought we would have trouble with the mechanical aspect, especially with trying to turn the turntable using our dc motor. Our mechanical components worked really well after we switched the turnable design to a gear system. We had figure out most of our software and electrical components days before our demonstration. However, in an attempt to revise our code to take multiple pictures, we ran into some issues, which caused the freezing of our Raspberry Pi. Overall, we dedicated a lot of time to this project. Compared to the beginning of the semester, we were able to write and test scripts more efficiently. Not only did we get used to python syntax, we were a lot better with the logic of the code. When we ran into problems, we were able to indicate our mistakes and debug our code a lot quicker.
Future Work
If we had more time to work on the project, we would have first figured out how to resolve the issues of the piTFT freezing after sorting two pieces of clothing. We would also create another prototype that consists of a completely closed box (except where the clothing goes in) and stronger LEDs. This way we would not have to worry about variations in lighting. We would also look into using servo motors or stronger DC motors. Even though the current, yellow Gearbox DC motors worked in our current prototype, future prototypes would ideally be capable of holding heavier clothing such as jeans and sweatpants. Also, we would want to implement a mechanism that ejects clothing out of the back when a selected basket does not have that option. For example, if someone puts on a red shirt and no basket was selected for red, the clothing would be ejected out the back. In even more advanced prototypes, we would like to explore reading tags and labels to be able to divide clothes into other categories such as delicates. Finally, we would like to add a mechanism that can sort through an entire pile of clothing. This would require a much more advanced mechanism, but in this prototype, people would be able to decide how they want to sort their clothing after they already have it in a hamper.
Work Distribution
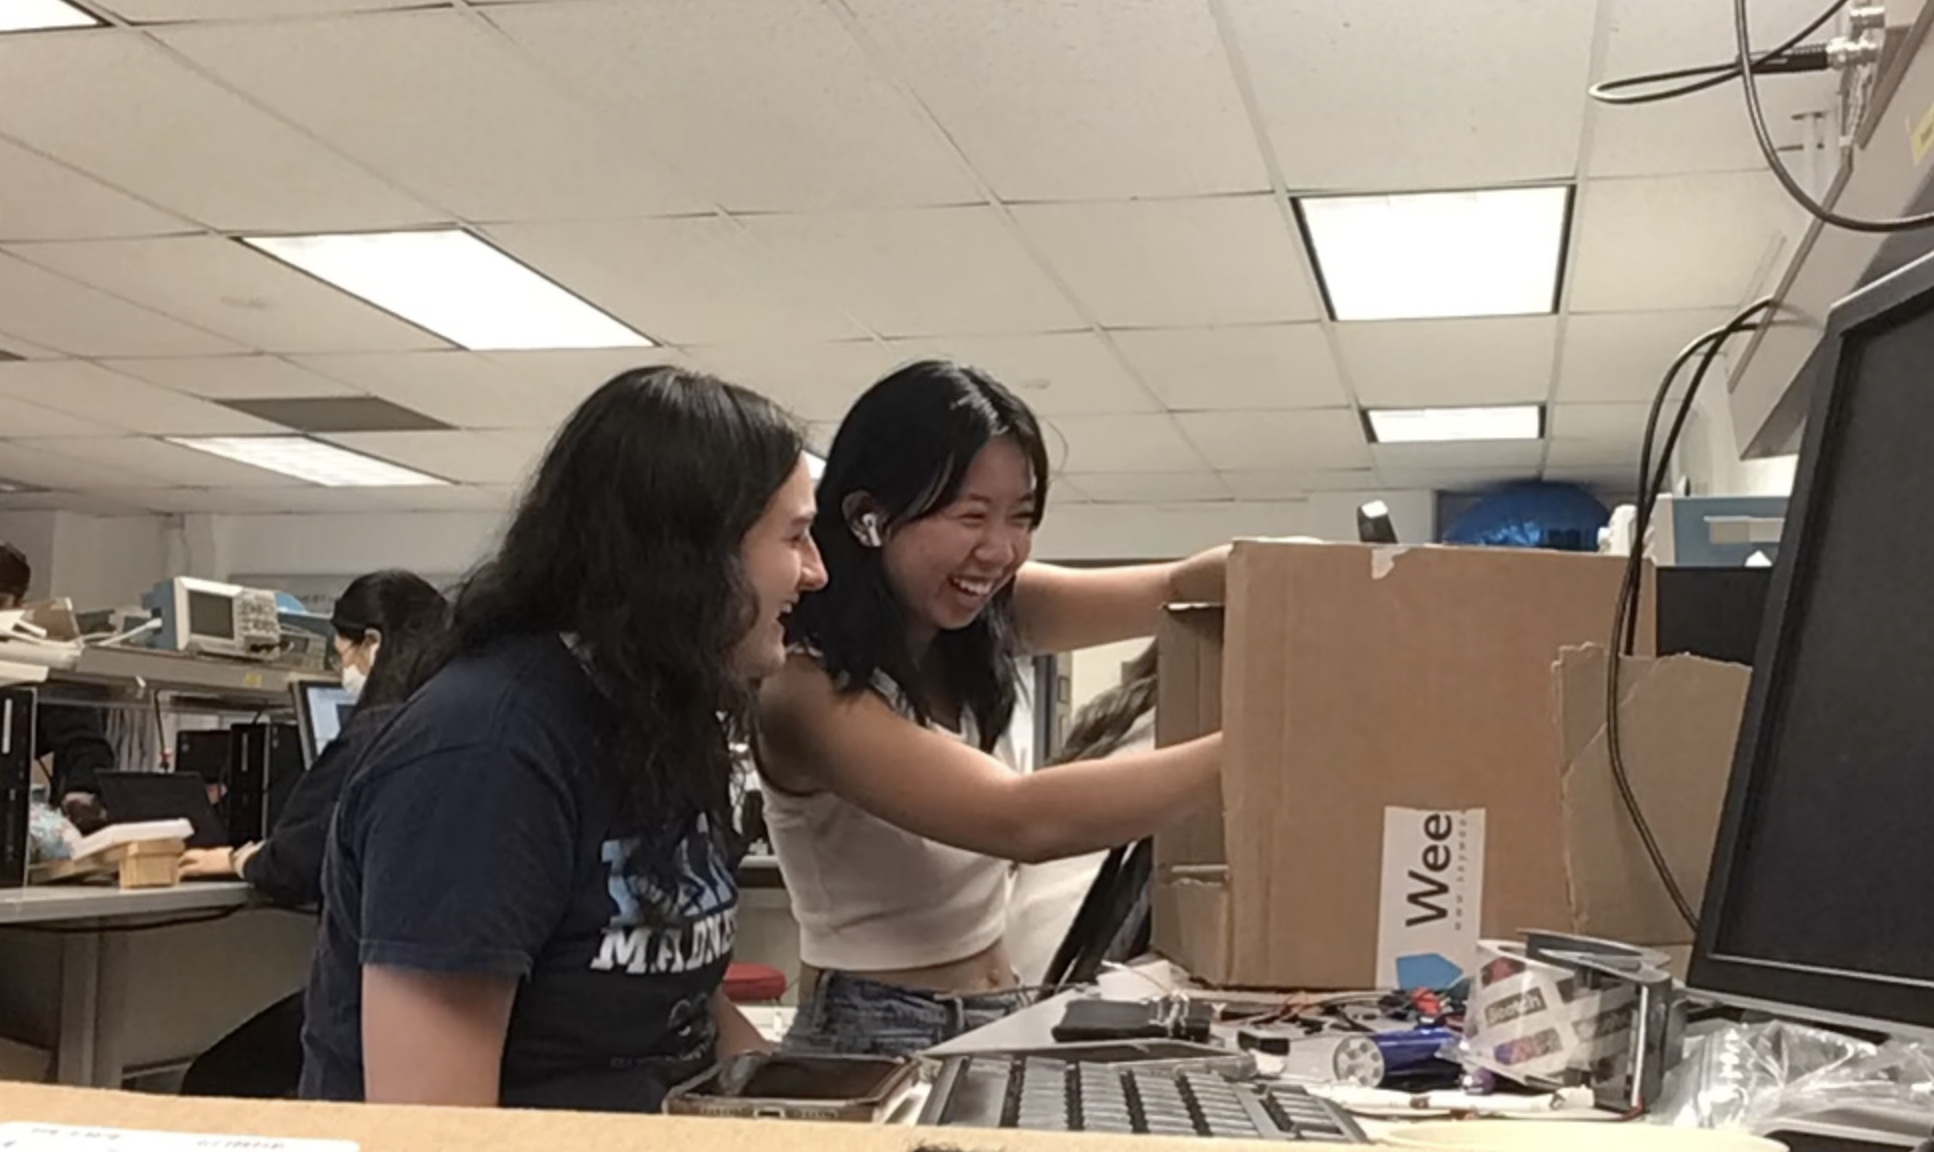
Project group picture
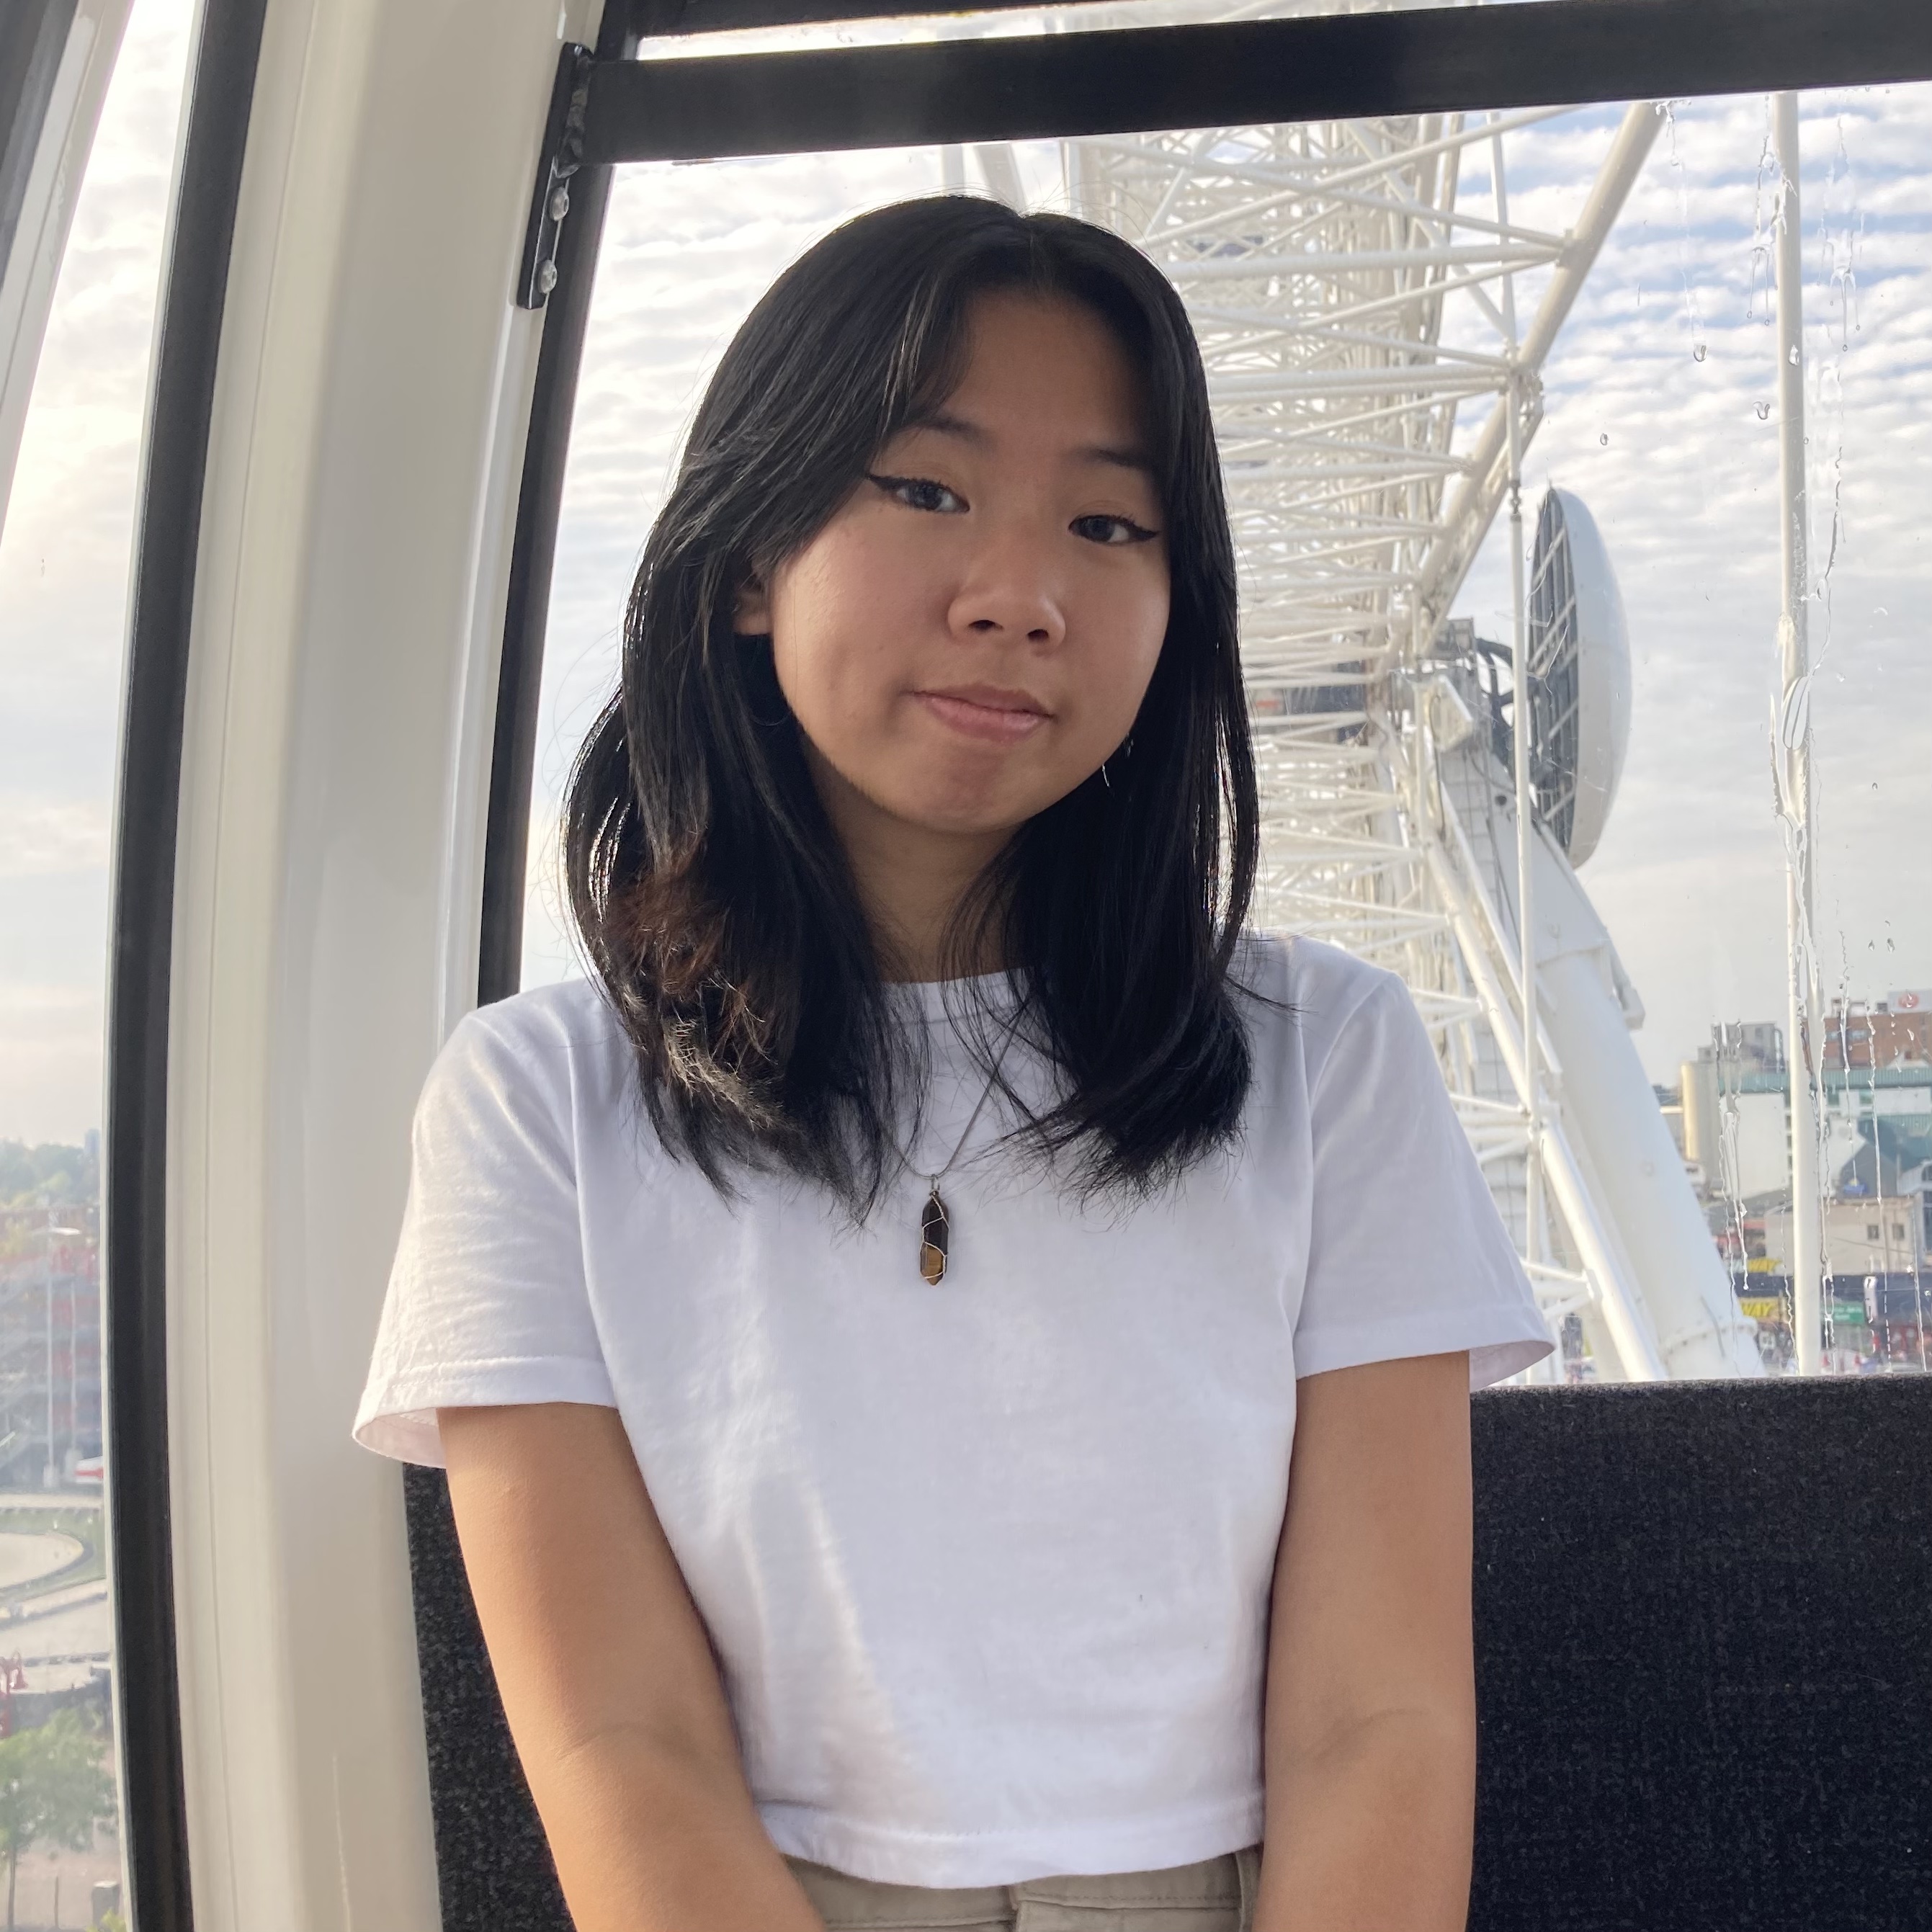
Ning Ting Ni
nn255@cornell.edu
Designed mechanical system, coded python scripts, mechanical assembly, tested system.
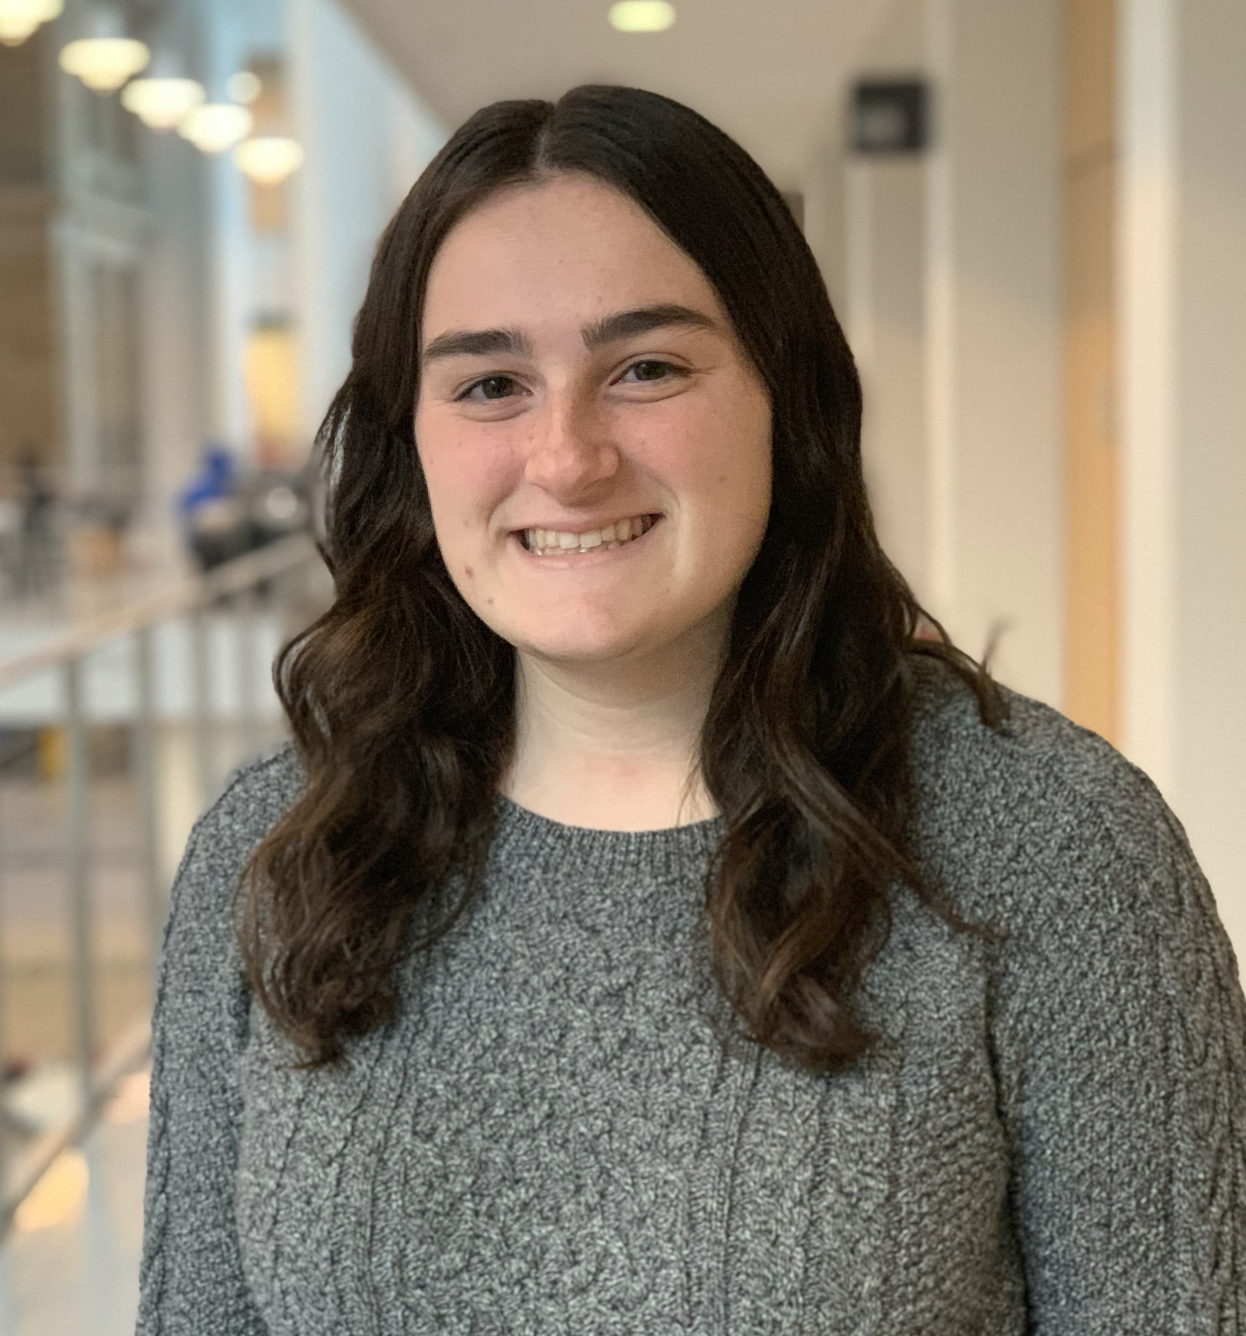
Chelsea Frisch
caf238@cornell.edu
Designed mechanical system, coded python scripts, mechanical assembly, tested system.
A Day in the Life of 2 ECE students
Parts List
- Acrylic Sheet $20.00
- OpenCV Camera $25.00
- Extra Sticky Wheel $2.50
- Battery Pack $1.50
- 2x Motor Driver - $5.50/ea
- 4x DC Motors - $2.95/ea
- LEDs, Resistors, and Wires - Provided in lab
- Cardboard - From home
Total: $65.80
References
[1] Downloading OpenCVColor Ranges
Changing Colorspaces
Computer Vision - for understanding HSV
Laundry Basket Image